Xendit
Complete guide to setting up and configuring Xendit payment processing for your CheckoutJoy account, including subscriptions and payment plans
Overview
Xendit is a leading payment gateway in Southeast Asia that enables businesses to accept payments online. This comprehensive guide will walk you through the simple process of integrating your Xendit account with CheckoutJoy to start processing payments quickly and securely.
Quick Setup Guide
Supported Payment Options
With Xendit integration, CheckoutJoy enables you to offer flexible payment options to your customers:
Adding your account details
Setting up your Xendit integration takes just a few simple steps:
In your CheckoutJoy dashboard:
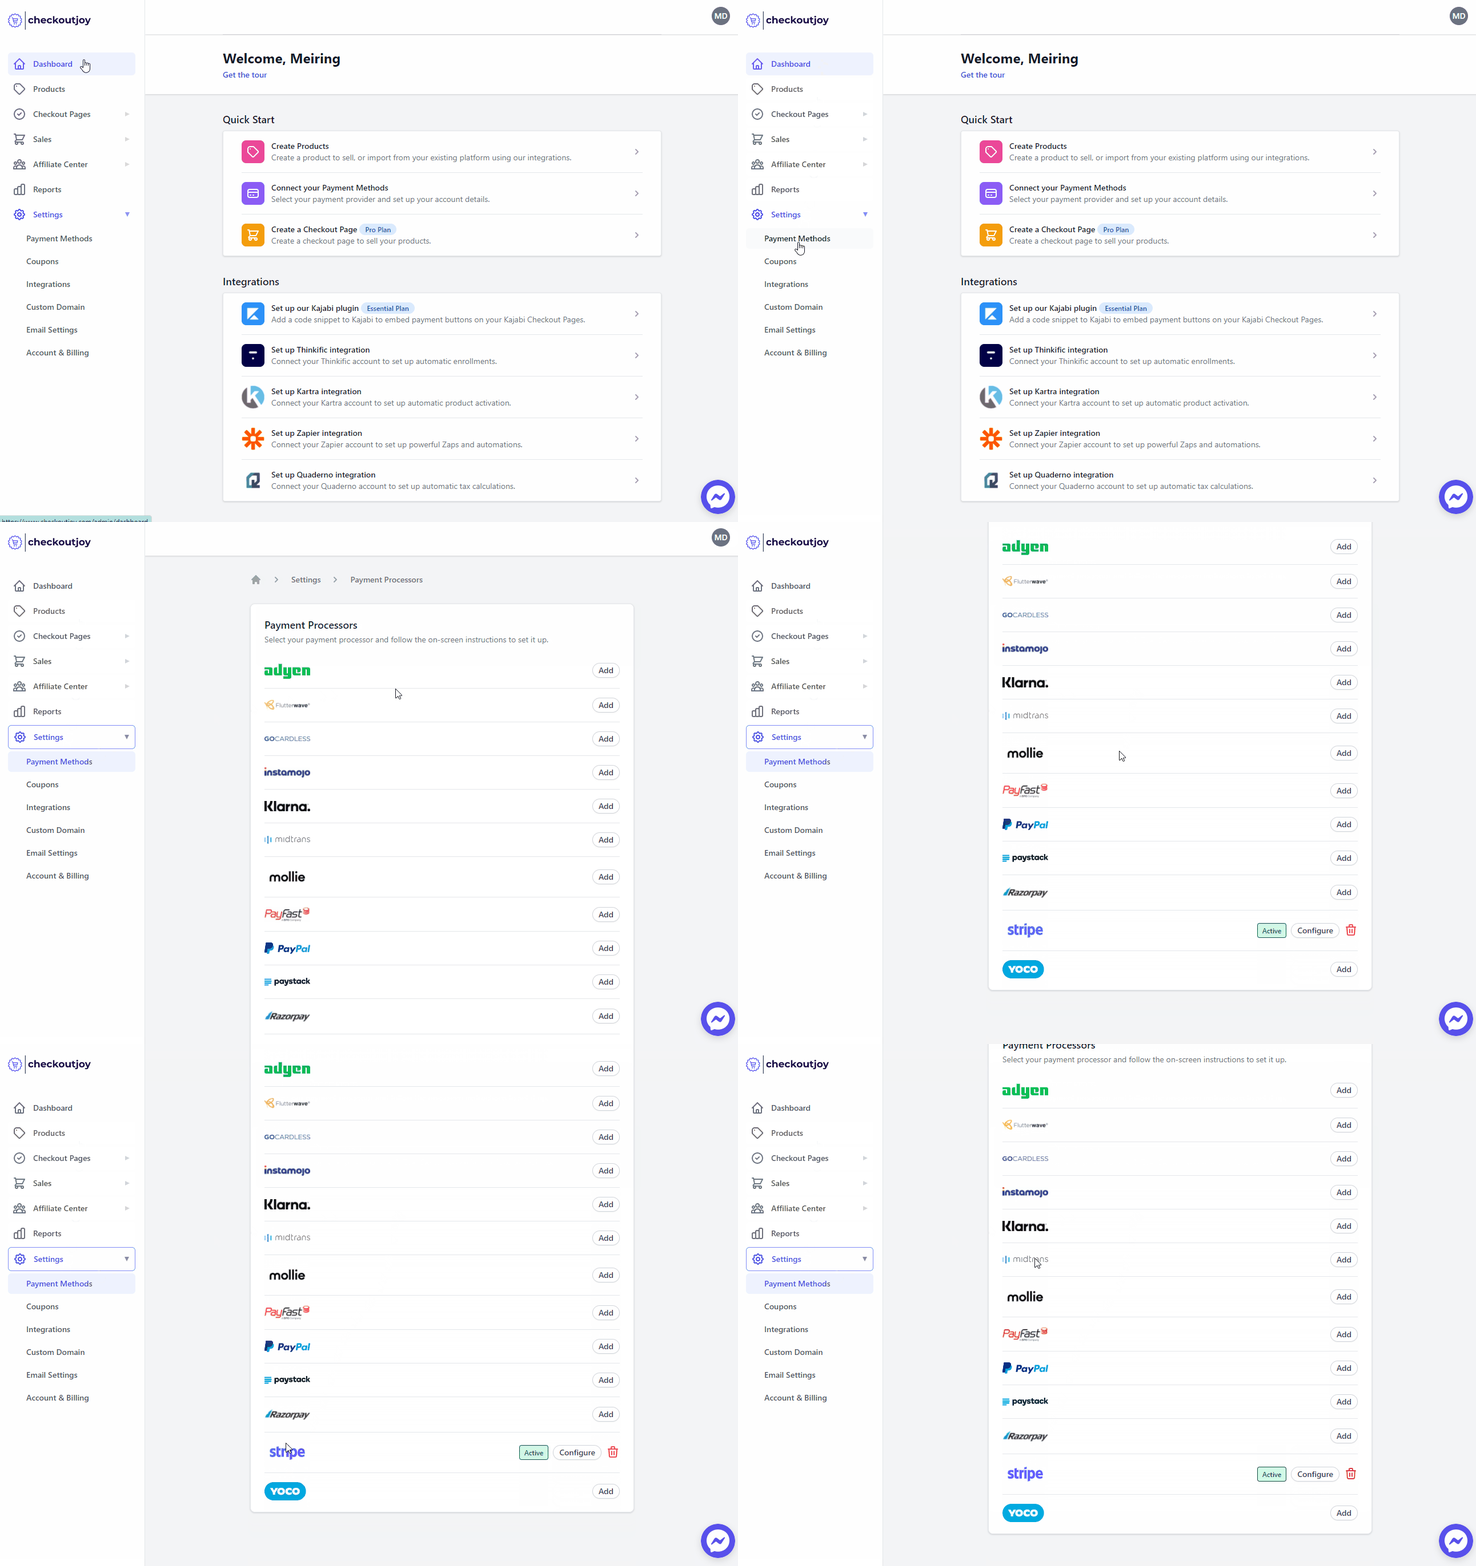
- Navigate to Settings > Payment Methods
- Select Xendit from the list of processors and click on Add

Finding your API Key ID and Secret
To connect your Xendit account, you'll need to generate API credentials:
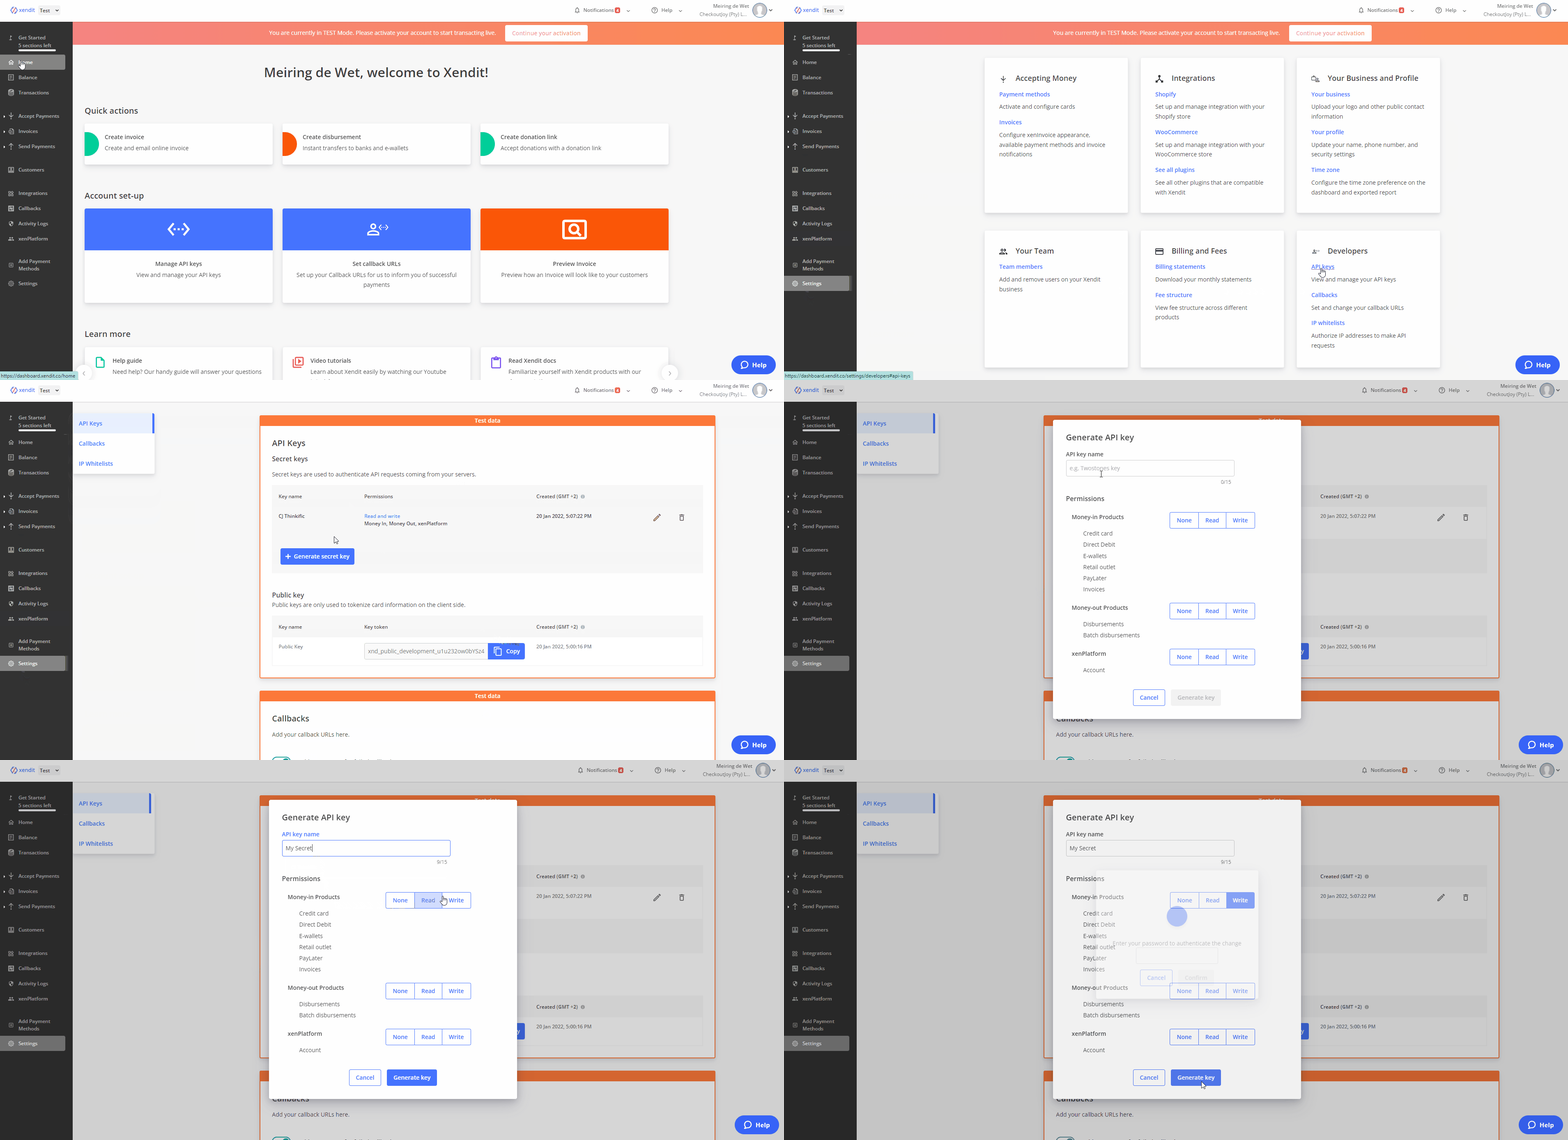
- Log into your Xendit dashboard
- Navigate to Settings > API keys
- Create a new Secret Key with write permissions for the Money-in Products
- Copy both your API Key ID and Secret Key for the next step

Setting up webhook notifications
Webhooks are essential for real-time communication between Xendit and CheckoutJoy. They ensure your customers get immediate access to your products after payment and allow CheckoutJoy to properly manage subscriptions and refunds.
To configure webhooks:
- In your Xendit dashboard, navigate to Settings > Webhooks
- Click the Add New Webhook button in the top right
- Fill in the form with these exact details:
| Setting | Value |
|---|---|
| Webhook URL | https://api.checkoutjoy.com/v1/notify?p=Xendit |
| Secret | Create any secure string value |
| Active Events | Select all Payment Events, Subscription Events and Refund Events |

Activating Xendit on your CheckoutJoy Checkout Pages
Once you've configured your API keys and webhooks, you need to activate Xendit on your checkout pages:
- Visit your CheckoutJoy dashboard
- Select Payment Methods from the main menu
- Under AVAILABLE PAYMENT PROCESSORS, find and select Xendit
- Enter your API credentials from the previous steps
- Click Save to activate Xendit for your checkout pages
Subscriptions and Payment Plans
Boost your revenue with recurring payments! CheckoutJoy seamlessly integrates with Xendit to support both subscription and payment plan options for your offers across all supported platforms.
How it works:
- When you create an offer in CheckoutJoy with either Subscription or Multiple Payments billing type
- CheckoutJoy automatically creates the necessary subscription or payment plan in your Xendit account
- Your customers enjoy a smooth checkout experience
- You receive payments automatically according to the schedule you've set
Important: Complete your Xendit payment method setup and API configuration before creating subscription or payment plan offers in CheckoutJoy.
Accepting USD Payments
Xendit now supports accepting payments in USD, allowing you to expand your customer base globally.
Contact Xendit support to enable USD payments on your account. Once enabled, you can set up USD pricing for your products in CheckoutJoy.
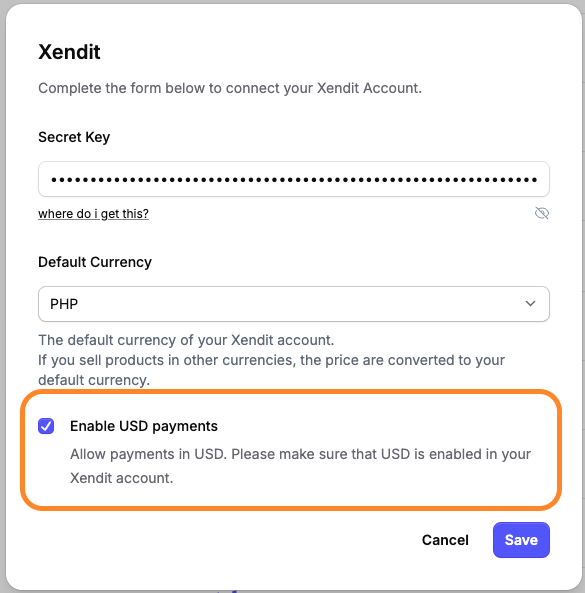
To enable USD payments for Xendit, enable the checkbox for "Accept USD Payments" in your Xendit settings within CheckoutJoy.
This allows you to create offers priced in USD, and your customers can pay using their preferred USD payment methods.
